Publishing a new seminar
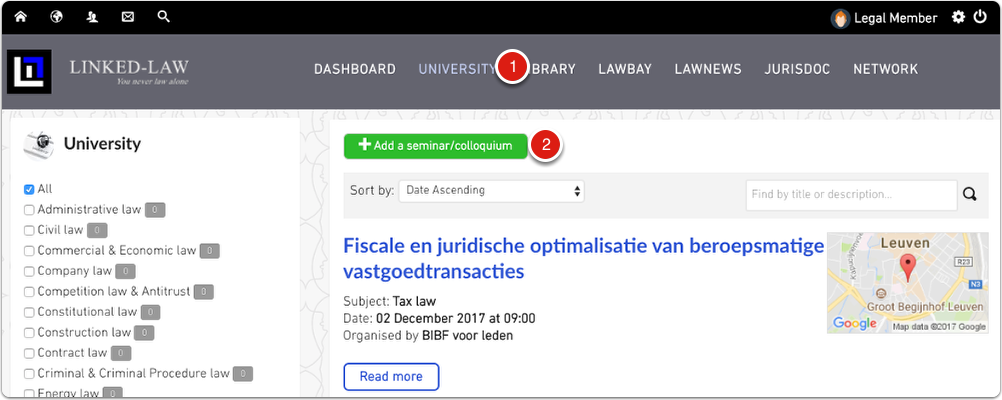
After logging in, choose the University (1) menu item at the top of the page. Then press the "Add a seminar/colloquium" (2) button to start writing a new article.
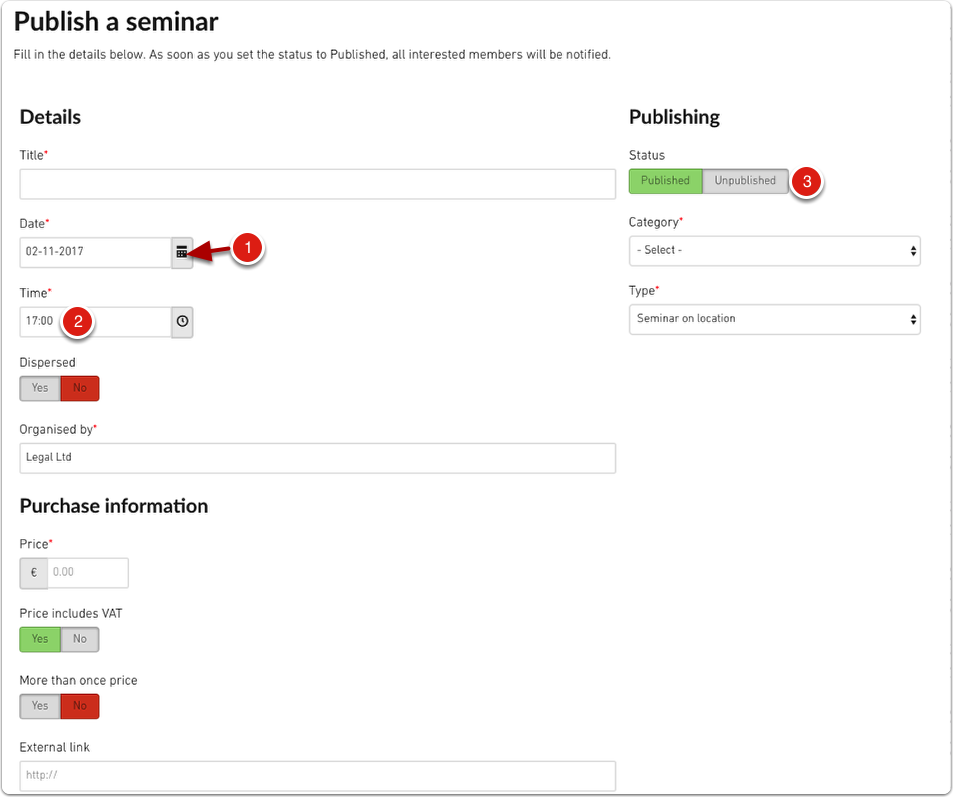
The following form will show. All fields indicated by * are required fields.
Here is a short description for the most important fields shown below:
- Specify the date of the event by pressing the calendar icon (1) on the right side of the Date field.
- You can set the hour by clicking in the Time (2) field and then selecting the hour and minutes by dragging the hands of the clock.
- Every seminar will be published as soon as you submit it. However, if you wish to draft a book without publishing, you can change the Status field to "Unpublished" (3). If a book is unpublished, only you can access it until you change the Status to "Published" (3) and save it again. Only then will it be available to all members of the platform.
If you scroll down on the page, you'll see the address fields as shown below. If the venue has a specific name, you can write it down in the "Venue" (1) field. This field is not required.
It is recommended to set the correct address (2) using the appropriate fields. As soon as a valid address is filled in, a map will show up on the right side of the form. If you only put in a "Venue" (1) name, the map will not be shown.
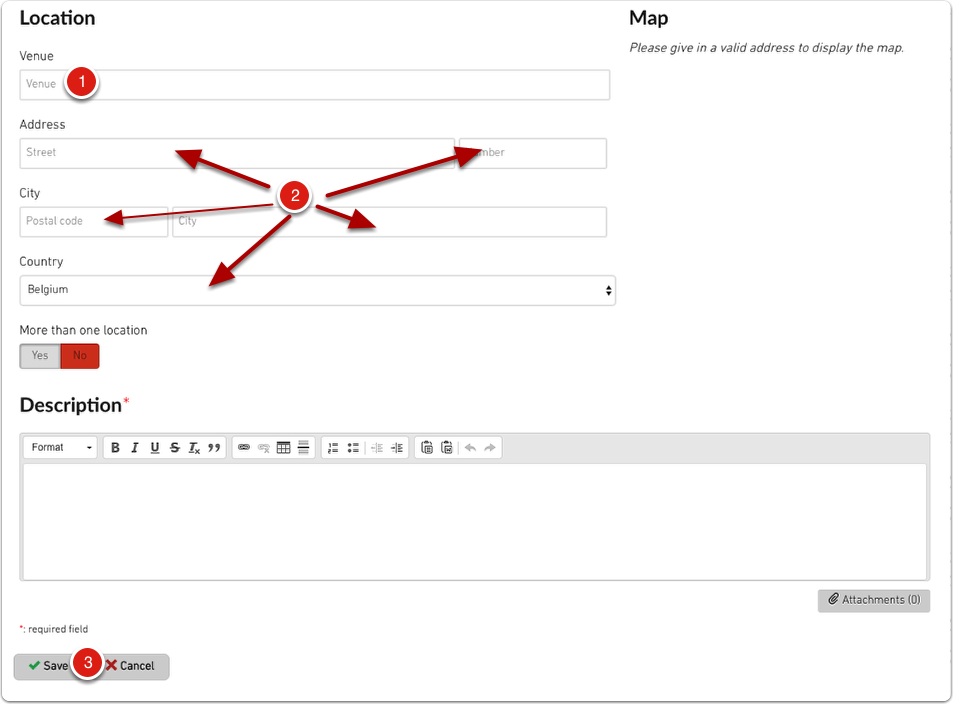
Once you have completed all fields and set the correct Publishing Status, you can press the green "Save" (3) button to publish your book in the Library.
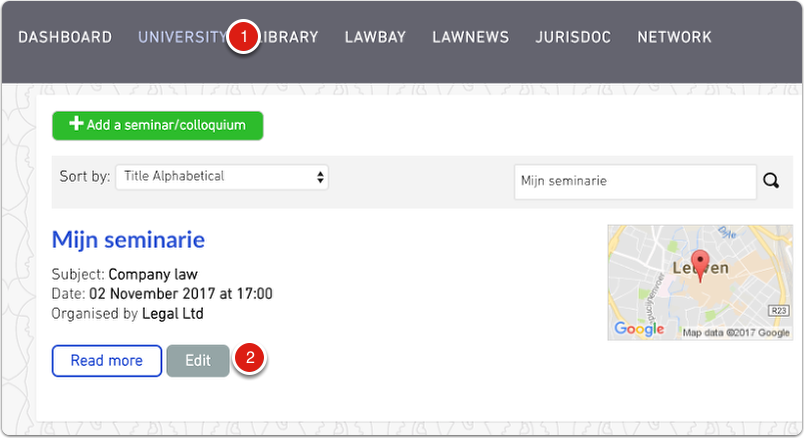
Making changes to an existing seminar
Once your seminar has been published, you can still make changes to it if you need to. In the list of University (1) seminars, look for the grey "Edit" (2) button below your seminar. Clicking on that button will open the seminar form again so you can make the necessary amendments. Once you're finished making changes, press the green "Save" button at the bottom of the form again.